
Delicious Peanut Butter Snack Bar
- Moy's Gluten Free Kitchen

- Mar 13, 2021
- 3 min read
In comparison to store bought snack bars or granola bars, these are healthier, delicious, filling and far less expensive!
The Benefits of Eating Nuts and Seeds
As a whole eating nuts and seeds can be very satisfying and they are packed with a variety of nutrients, protein, fiber and powerful antioxidants (once you can have them).
There is research suggesting that the nutrients in nuts can have a protective effect on heart health, diabetes prevention, cancer, neuro-generative diseases and further may be helpful for weight loss or maintenance.
Seeds are said to contain a surprising amount of nutrients including essential fatty acids like omega-3, protein, fiber and a range of healthy antioxidants.
I am only restating what I have found in my online research, you must decide whether you agree or not. However, based on that information, it is safe to say that this recipe makes a better for you snack bar.
What if you cannot have nuts?
If you are allergic to nuts, you can use a variety of seeds. There is even allergen-friendly sunflower butter which can be used in place of peanut butter. You may need to vary the amount of milk you use but the recipe itself works well with substitutions
Health Benefits of Dark Chocolate
My recipe also includes dairy free dark chocolate chips. Chocolate is made from the seed of the cacao tree and cocoa is rich in flavanols, which are plant chemicals loaded with nutrients that can positively affect your health. In fact, quality dark chocolate is rich in fiber,
iron, magnesium, copper, manganese and a few other minerals. Dark chocolate is also loaded with organic compounds which include polyphenols, flavanols and catechins, that function as antioxidants.
Dark chocolate might help to protect your heart, reduce the risk of diabetes and lower blood pressure.
Even while I'm saying that this bar is better for you, especially in comparison to store bought bars, I am not giving you medical advice, nor am I suggesting that you can binge on them without consequence. Your health is your responsibility, my bars just makes that task 'sweeter"
Other Snack Bar Recipe
You can also try my refined sugar free snack bar, which has slight variations to this recipe.
Hope you enjoy this recipe! Leave me a comment or contact me if you have questions
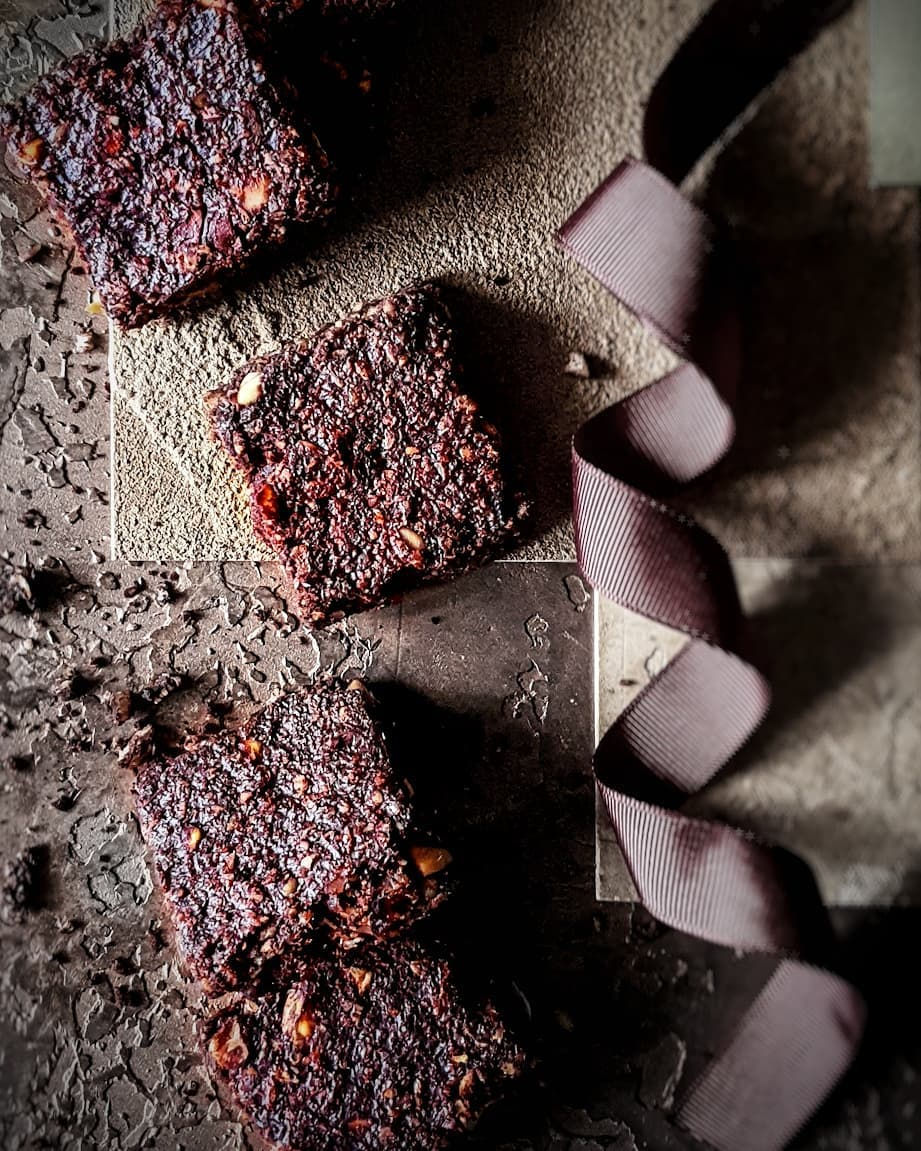
Gluten Free and Vegan Peanut Butter Snack Bar Recipe
Ingredients
1 cup rolled oats
¼ cup of unsweetened cocoa powder
¾ cup coarsely ground nuts and seeds*
¼ cup chocolate chips (I used 65% dark and dairy free)
1½ tbsp flax meal (ground flax seeds)
¼ cup peanut butter (or other nut butter)*
¼ – ½ cup coconut milk (add a little at a time)*
pinch of salt
2 tbsp brown or coconut palm sugar (optional)
Notes*
Any combination of nuts and seeds can work e.g. almonds, walnuts, sunflower seeds. I’ve also used dried fruits like cranberries
The peanut butter I used was sugar and salt free with no added vegetable oils. If you are using peanut or other nut butter with sugar and salt etc. add the nut butter before adding the salt or sugar suggested in the recipe. Taste and adjust accordingly
You can use more peanut butter than is specified in the recipe. If you do, you will need less coconut milk. Whatever you decide add the milk a little at a time until the mix is sticky enough to hold together. It’s possible that you may need more milk than is stated
Directions
Preheat the oven to 350 degrees F. Line the bottom of a baking tray with parchment paper allowing the paper to overhang from the sides. Set aside.
In a large bowl, combine until evenly mixed the oats, cocoa powder, mixed nuts/seeds, chocolate chips and flax meal. Set aside.
Add the peanut butter to the dry mix (as per recipe or more, see notes above) and combine until it’s evenly distributed. Add the milk, a little at a time kneading it into the mixture until it all sticks together and can form a ball. Taste for salt and sugar, add if desired. Leave the mixture to rest for about 5 minutes. After the 5 minutes and only if necessary you can add a little more milk so the mixture is decidedly sticky and holding together
Spread the mixture evenly into the prepared baking tray. Press down firmly and smooth with a pastry roller or a flat sided object to the desired thickness. Bake in the oven for 8 – 10 minutes or until it is just set.
Remove from the oven and allow to cool in the pan for about 5 mins. Hold onto the parchment paper and lift the entire sheet out of the pan and place on a wire rack to cool completely before cutting into squares. Store in an airtight container (refrigeration storage works best for me)

Comments