top of page
A happy, healthy kitchen scene with a grocery brown bag of fruits and vegetables and_pantr

The Essential Guide to Gluten Free Living

“Tired of the guesswork? Discover what gluten-free really means and how to eat well—grab your free guide and start living better today!”

Recipes, Tips and Other Info

  • Writer: Moy's Gluten Free Kitchen
    Moy's Gluten Free Kitchen
  • Dec 22, 2019
  • 4 min read

Updated: Dec 27, 2019

A traditional crown bread (couronne) uses a different method for shaping. Gluten free dough, without further enhancements, is not strong or elastic enough to manipulate in that manner. You can however with a bit of creativity make and shape a believable end product. Read on, get inspired, make your own crown or wreath shaped bread!

Gluten Free and Vegan Crown Shaped bread
Gluten Free and Vegan Garlic and Olive CouronneGluten Free and Vegan Couronne


Ingredients

¼ cup almond flour

1 cup brown rice flour

½ cup potato starch

¼ cup tapioca starch

½ tsp xanthan gum

1½ tsp instant yeast

2½ tsp baking powder

1 tsp brown sugar

¼ tsp salt (see notes)

2 tsp nutritional yeast flakes (optional)

½ tbsp olive oil

½ - ¾ cup warm water (105-115°F)

1 tsp vinegar

3–5 cloves of garlic minced

¼ cup of sliced olives (see notes)

tapioca starch for shaping the dough

Notes

You can sub the flour, starches and xanthan gum with an equivalent amount of a GF bread flour mix i.e. 2 cups

The brine in which the olives are soaking is often salty. If it isn't, you can add an extra pinch of salt. If you are in doubt use only the ¼ tsp suggested in the recipe

If you are using olives from a jar and the brine contains oil, omit the oil from this recipe.


Directions

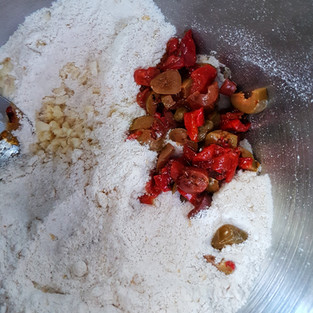
Place all of the dry ingredients in a bowl, mix well

Make a well in the center of the dry ingredients and add the wet ingredients, start with ½ cup of water. Leave out the olives and the garlic. Knead or mix the ingredients until thoroughly combined. Add more water, very little at a time, if needed. Saturate the dough just enough so it is soft but not as wet as regular gluten free bread dough since the olives will add moisture when it is added later

Cover the bowl with cling wrap or other and set aside in a cool place to rest for about an hour. This step is optional, I have found that resting the dough improves the texture of the finished loaf. Allowing the dough to slow rise overnight in the refrigerator is also an option. Most artisan bakers agree that slow fermentation produces a more developed flavor

Prepare a round baking tin 7” or 8” in diameter. A smaller baking tin means larger buns and a smaller crown.

Prepare a floured surface to shape the dough. You will also need a round oven safe dish to create the shape in the center of the crown. I used a ramekin wrapped in parchment paper

Separate the equivalent of about ½ cup of dough, set aside, keep covered

To the rest of the dough add the olives and garlic. Mix well to distribute the olives and garlic evenly throughout. The dough should be a bit sticky but fairly easy to handle. More moisture will give the bread a better crumb, too much will make it difficult to shape and to maintain the shape. Add only as much water as you are comfortable with, at least until the dough feels sticky to the touch

Divide the dough into 7 pieces. Shape the pieces into smooth round balls. Place the dough rounds into the baking tin and around the dish in the center, spacing them as easily as possible. Cover with lightly greased cling wrap and set aside. Working with lightly oiled or flour dusted hands helps

This is where you can get creative in terms of finishing your crown design. This is what I did, you can modify at will

Pinch off pieces of the dough you set aside, 7 pieces about ½ tablespoon each. Roll each piece into a ball. Place the rounds in between the buns, connecting the buns to complete the ring. The rounds are not meant to fill the length of the gaps completely. Use water as the glue to stick the pieces in place

Roll the remainder of the dough into a circle,1/4” thick or less. Cutout a dounut shape that is large enough to form a ring to clear the dish in the center and to partially cover the crown shape. This is meant to further bind the crown and keep it together as one piece. Again, for this and the step that follows, use water as the glue to stick the piece(s) in place

Finally with the remaining scraps cut out small squares (about 1¼”). Turn the squares on the diagonal in a diamond shape, placing them in the gap between each round. Pinch the top of each diamond backward to create the “spikes” on the crown

The important thing here is to find creative ways to connect the buns, forming the crown shape. You can decide what works best for you

Cover with oiled plastic wrap and allow the dough to rise for an hour or more

Toward the end of the rise preheat oven to 350°F. Add a dish or tray of boiling water at the same time you are placing the bread in the oven. You can further spritz the interior of the oven with water just before you close the oven door. In whatever way you can try to create steam which will produce a crackly crust

Lightly dust the “outer rim” of the crown with flour (like brown rice or cornmeal flour). When the oven is ready, bake the crown for 25 minutes. The finished buns will be golden in colour and sound hollow when tapped

Place the crown onto a rack and allow to cool. Brush the inner rim with a little oil. Serve when ready. If you are making ahead, cool the bread, wrap it tightly and store in the freezer


  • Writer: Moy's Gluten Free Kitchen
    Moy's Gluten Free Kitchen
  • Dec 14, 2019
  • 3 min read

Updated: Sep 8, 2020

There are fruit cakes and there is Trini Fruit Cake, as in the boozy, pudding like, almost black looking cake popular in Trinidad and Tobago at weddings and at Christmas. It’s not an easy favourite, there is a bitter sweet taste from the molasses and caramelised sugar that gives it the characteristic dark, almost black colour. It is however a real treat because most only get to eat it once for the year like a seasonal fruit which makes it all the more desirable. And the process...traditionally the fruit is “soaked”, left to cure for weeks and months in alcohol. Plus after baking the cake is soaked with more alcohol and with time perhaps even more alcohol.


This is one of the easiest cakes you will ever make gluten free. Dense is okay and the large volume of fruit makes it virtually impossible to crumble. Start with the basic recipe and add your own touches, make it darker, lighter, add more alcohol, more fruit, less if you prefer. Trini fruit cake keeps, it can last for months perhaps years if wrapped tightly and stored, in the freezer or a cool cupboard. On that note, happy baking, just dive in don’t worry about it at all, it’s bound to be great!

Gluten Free Trini Fruit Cake
Trini Fruit Cake

Trini Fruit Cake
Gluten Free Vegan Trini Fruit Cake

Ingredients


1½ cup gluten free flour blend

½ tsp xanthan gum (omit if in your flour blend)

2¼ tsp baking powder

1½ tsp baking soda

¾ tsp salt (omit if in your flour blend)

¼ tsp cinnamon

3 tbsp flax meal

¾ - 1 cup water

¼ cup + 2 tbsp sugar

¼ cup + 2 tbsp oil

1½ tsp vanilla extract

1½ tsp almond extract

2 dashes of Angostura bitters

2 tbs browning (more for darker colour)**

2 tsp molasses

1 tbsp vinegar

1½ cup pureed mix fruit ***

cherry brandy

¼ cup white rum (or to preference)

**browning refers to a syrupy dark caramelised sugar and water mixture

** the pureed mix can be any combination of dried fruit e.g. raisins, sultanas, currants, dates etc. The fruit is soaked in alcohol, usually rum and cherry brandy, until softened and then blended to form a thick puree. Fruits can be soaked anywhere from a few hours to a few days or months. For 1½ cups of pureed fruit as used in this recipe, you will need approximately 1½ - 2 cups total dried fruit, soaked and blended with ¾ cup of liquid (or enough liquid to cover the fruit)

Directions

Preheat oven to 275°F. Prepare an 8” baking tin, set aside.

Combine the flour, xanthan gum, baking soda, baking powder, salt and cinnamon, set aside

To your mixing bowl add the flax meal, ½ cup of water and the sugar. Whip, beat or mix until slightly thickened. Turn off the mixer or stop beating and leave to rest for about 5 minutes

Once rested, resume mixing or beating, gradually adding the oil. Whip until the oil is fully incorporated and the mixture lightens in colour

Add the extracts, bitters, browning, molasses, vinegar and mix again. Now add the flour and mix until just blended. Turn off the mixer and fold in by hand the pureed fruit, the mixture will be thick but not stiff, somewhat like a muffin batter. If necessary add some water to achieve the right consistency. You could also use cherry brandy instead of water.


Spoon the batter into the baking tin. Bake at 275°F for 50 minutes or until a pick inserted in center comes out clean.


Allow to cool in the baking tin for about 15 mins. Prick holes with a toothpick all over the top of the cake. Pour the rum on the cake distributing as evenly as possible. Allow the cake to rest in the tin if possible for a few hours or overnight. Store in a tightly sealed container. The cake will keep for an indefinite amount of time in the freezer or a cool cupboard because of the alcohol. It can be soaked again to your preference


  • Writer: Moy's Gluten Free Kitchen
    Moy's Gluten Free Kitchen
  • Dec 11, 2019
  • 2 min read

Mango and Orange Panna Cotta Tart
Gluten Free, Vegan Mango and Orange Panna Cotta Tart

(serves 4 - 5 using a 5” mini tart pan)

Ingredients

Base

Leftovers e.g. cake, donuts, cookies

1 tbsp maple syrup

½ tbsp oil (if needed)

water (if needed)

sugar & salt to taste

Filling

1 cup coconut milk

2 tbsp agar agar flakes

1 cup mango puree*

½ cup orange juice

pinch of salt

¼ cup confectioners sugar

½ tsp vanilla extract (optional)

*I use a fleshy mango that has little or no fibrous bits so I do not have to strain the pulp. The Julie mango that is available in Trinidad and Tobago is my preference


Tart Base

To make the base, pulse the leftovers to form a crumbly mixture. You will have to estimate how much “leftovers” is needed to make 1 cup of the crumb mix

In a mixing bowl, add the maple syrup to the crumb mix and combine. The crumbs should hold loosely together if pressed, no need to form a dough. If necessary add a little oil or water to moisten the crumbs so that it will stick together. Season with salt and/or sugar if needed


Spoon the crumb mixture into the tart pans, press down until the crumbs stick together to form the base. Set aside

Tart Filling

Add the mango puree, orange juice, salt, confectioners sugar and vanilla extract if using to a blender or food processor cup. Set aside

Add the milk and agar agar flakes to a saucepan and bring to a slow boil on medium to low heat. Stir to melt the agar agar flakes

Once the flakes have melted add the milk to the mango puree mixture (you may have to let the milk cool a bit first). Blend until smooth

Divide the mixture evenly between the tart pans. Allow the tart to set in the refrigerator before serving


bottom of page