- Moy's Gluten Free Kitchen

- Jun 23, 2019
- 4 min read
Updated: Mar 26, 2021
Do you miss pizza? I remember frequenting a popular pizza restaurant and ordering breadsticks as a side. I loved the crispiness of the crust, it was a bit oily but that also made it the perfect appetizer. I mean I gave no thought to how healthy or unhealthy it was
Breadsticks were also popular when liming (hanging out) with a group of of friends at home or out. It was just the perfect amount of indulgence and it was filling, especially if you could not stop at one!
I've taken my love of breadsticks and made a gluten free and vegan version. Plus it's baked so you can say that it's healthier. This breadstick is also garlicky and cheesy, nutritional yeast adds the cheese flavor. I serve it with a basic tomato marinara sauce, of course you can use whatever you like.
You are free to add different seasonings and you can most certainly shape the breadsticks in whatever way you prefer
Hope you enjoy it, your feedback is always welcome!

Gluten Free and Vegan Cheesy Garlic Breadstick Recipe
Ingredients
½ cup brown rice flour
¼ cup almond flour
¼ tapioca starch
¼ cup potato starch (not potato flour)
½ tsp xanthan gum
1 tsp instant yeast
2 tsp baking powder
¼ tsp salt
½ tbsp nutritional yeast*
¼ tsp of dried basil**
¼ tsp of dried oregano**
dash of cayenne pepper (to taste)
3 - 5 finely chopped garlic gloves (to taste)
½ –1 tsp tomato paste
1 tbsp olive oil
1/3 cup coconut milk (more if needed)
2 tsp vinegar
tapioca starch for rolling out the breadsticks
*nutritional yeast adds a cheesy flavor
**fresh finely chopped basil and oregano can be used
Making the Dough
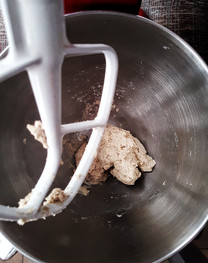
Mix together the dry ingredients until properly combined. Add in the chopped garlic and mix again
Make a well in the center of the dry ingredients and add the wet ingredients all at once. Mix or knead to form a somewhat smooth dough. The dough should be lightly sticky to the touch but firm and easy to handle.
Cover the mixing bowl or wrap the dough tightly in plastic wrap and set aside to rest for at least 15 minutes. You can also refrigerate the dough for several hours or overnight. The longer rest period enhances the flavor of the dough.
After the rest period continue to Shaping the Dough
If you used a longer rest time, when ready remove the dough from the fridge and allow it to warm up a bit if it is too stiff to work with. There is no need to let it come to room temperature.
Shaping the Dough
Line a tray (12” x 8” at least) with parchment paper and set aside
Prepare a floured surface to make the bread sticks. Since the dough is not very sticky, it should be fairly easy to work with and you should not need a lot of flour to roll it out. You can moisten your hands with oil or water, or dust your hands with some of the tapioca starch to help you handle the dough.
Pinch off a piece of the dough, leaving the remainder of the dough covered while you work. I use about the equivalent of a packed ¼ cup by volume for each piece. You can use more or less, the final size (and shape) of the bread stick is up to you. On the floured surface roll out the dough to your desired thickness, length or shape. I roll each piece into a noodle 1/4” or so in diameter. I fold the noodle in half to form an elongated C shape, then I “braid” it into a corkscrew to 4” – 5” in length . I have also used this dough to make garlic knots. The dough is delicate so use a light hand. Even if it breaks you can reattach the pieces or simply start over, there is no gluten to overwork. Persistence and practice will “win the day”. Place the bread stick on the baking tray, cover with lightly oiled plastic wrap and continue until all the bread sticks have been made. Set the tray aside to allow the bread sticks to rise a bit.
While the bread sticks are proofing, pre-heat your oven to 425F
When the oven is ready and the bread sticks have puffed up a bit (does not have to double in size), place the tray in the oven.
Bake for 12 minutes. The bread sticks are done when they have browned and have pulled away from the parchment paper (if you shake the tray the bread sticks will move around). You may have to adjust your baking time, depending on the size of your bread sticks.
Remove from the oven, allow to cool on a wire rack. Serve warm. If using the same day and within a couple of hours, you can leave the bread sticks on a low keep warm setting in your oven (200F or less and covered with foil).
Best served the same day, otherwise wrap tightly and store in the freezer for an extended period of time