top of page
A happy, healthy kitchen scene with a grocery brown bag of fruits and vegetables and_pantr

The Essential Guide to Gluten Free Living

“Tired of the guesswork? Discover what gluten-free really means and how to eat well—grab your free guide and start living better today!”

Recipes, Tips and Other Info

  • Writer: Moy's Gluten Free Kitchen
    Moy's Gluten Free Kitchen
  • Jun 4, 2019
  • 3 min read

Updated: Nov 1, 2019

A gluten free & vegan recipe


Gluten Free, Vegan Puff Pastry Hand Pie
Trini style Currants Roll

Ingredients

Flaky Pastry Dough

½ cup brown rice flour

¼ cup almond flour

¼ cup potato starch (not potato flour)

½ tsp xanthan gum

¼ tsp fine sea salt

1 tsp brown sugar

¼ tsp baking powder*

1/3 cup unsalted vegan butter (very cold and cut into cubes)**

1/8 cup ice cold water

Potato starch for rolling out the dough


*Flaky pastry is not normally made with baking powder. I made an exception here

**I use a vegetable based baker's pastry margarine. The recipe will work with ordinary butter

Filling

1/3 cup dried currants***

1 ½ tbsp sugar (more if you like)

¼ tsp cinnamon

*** Can also use raisins, finely shredded coconut or cranberries

Directions

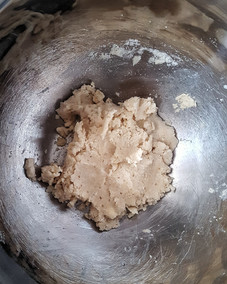
Mix together the dry ingredients until properly combined

Add in roughly 2/3 of the cold butter, you want to leave some butter for the next stage. With a fork or pastry blender, work in the butter until the mixture forms large crumbly pieces of dough. Add ice water, 1 tablespoon at a time, and press the pieces of dough together to form a crude ball. The dough should be moist, but not wet and it will not be smooth.

Wrap the dough tightly in plastic wrap and refrigerate for 10 - 15 minutes

Remove the dough from the fridge. Divide the dough into 2 pieces, place the unused portion back into the refrigerator. Put the dough on a lightly floured sheet of parchment paper or silpat mat and press with the palm of your hand to flatten. Lightly dust the top of the flattened dough and using a rolling pin begin to roll out the dough rolling away from you with light even pressure. You can also roll between 2 pieces of cling wrap. Lift and turn the dough a few times to ensure that it does not stick to the parchment paper. Do not overwork the dough, it does not have to be perfect and it is best to leave some of the butter in big pieces.

Using some of the reserved margarine, scatter small pieces of it on the dough. Fold the dough unto itself to form a small square. Do not worry if the dough does not hold tightly together, a crude square is sufficient. It is more important not to flatten out the margarine to the point where it is fully mixed into the dough. You can roll the dough out once more and repeat the folding process. Once you are finished with both pieces of dough refrigerate again for 15-20 minutes.

Make the filling: combine the raisins (or other) with the sugar and cinnamon. Using a food processor or a coffee grinder, pulse the mix a few times to break up the dried fruit. Do not puree. The dough is fairly delicate so breaking up the dried fruit makes it easier to roll out the dough without tearing. Set the filling aside

Line a baking tray with parchment and set aside

Working with one piece of dough at a time, roll out to about 1/8” thickness. Again the dough does not have to be perfect, you can patch up torn areas with a little water and small pieces of dough. Once you get the desired thickness spread half of the fruit mix evenly on the dough. Beginning at one end roll the dough into a cylindrical shape. If you use parchment paper or a silpat mat, use either to lift the dough and fold it over without touching the dough. Carefully place the pastry unto your prepared tray. Repeat the steps to shape the second piece of dough. When you are done, refrigerate again for another 15 – 20 minutes. If your kitchen is hot, before shaping the second piece, place the first shaped dough into the refrigerator

Preheat the oven to 400F

When ready, remove the pastry from the refrigerator. Brush the top with vegetable oil, I use coconut, or brush with the margarine. Make evenly spaced diagonal slits along the top of the pastry

Place in oven and bake for 20-25 mins or until the tops of the pastry turns slightly brown.


Brush again with the oil or margarine, turn the oven to 450F, place the tray back in the oven and let the pastry brown again to a deeper colour, 2-3 minutes

Remove form the oven let the pastry cool. Using the diagonal slits as a guide cut the pastry into individual serving size pieces

Wrap tightly and store in the refrigerator for a few days or freezer for an extended period of time


  • Writer: Moy's Gluten Free Kitchen
    Moy's Gluten Free Kitchen
  • May 29, 2019
  • 2 min read

Updated: Oct 19, 2020

(makes 8 regular donuts)


Chocolate Blender Donuts
Gluten Free Vegan Chocolate Blender Donuts

Ingredients

(You can also use this recipe to make Red Velvet Donuts, click on the link)


Donuts

1/8 cup brown rice flour

1/8 cup potato starch

½ cup almond flour

¼ tsp xanthan gum

¼ tsp salt

¼ cup brown sugar

2 tbsp natural unsweetened cocoa powder

1 tsp instant coffee

1 tsp baking powder

1 tsp baking soda

1 medium - large ripe banana

2/3 cup coconut milk

½ tsp vanilla extract

1 tbsp coconut oil

½ tbsp apple cider vinegar

Chocolate Glaze

½ cup dark chocolate chips

1 tbsp coconut oil

Directions

Donuts

Preheat oven to 425 F. Prepare your donut tin, this recipe makes 8 regular sized donuts so prep for that amount.

Combine the dry ingredients and set aside.

Add the banana, coconut milk, vanilla extract and oil to a blender cup and blend until smooth

Add the dry ingredients to the blender mixture and blend again until combined. You may need to stir the mixture with a spatula to ensure that it is properly blended. The mixture should be thick but pourable, add a little bit of coconut milk if necessary.

You could add all of the ingredients at once. Stir the mixture to combine and then blend.


Before adding the vinegar (next step), ensure that all of the ingredients are fully blended.

Finally add the vinegar and blend once more to incorporate.

Pour the mixture into the prepared donut tins, filling to 2/3.

Bake for 10 – 12 minutes

Allow the donuts to cool and then coat with the chocolate glaze. Let the glaze set for a few minutes before serving (although I love the messiness of the just poured glaze).

Chocolate Glaze

Place the chocolate chips in a microwave safe bowl. Microwave for 30 seconds. Stir the chocolate and repeat until all of the chocolate has melted. This should not take more than 3 x 30 second intervals. Stop when the chocolate is mostly melted and only a few tiny pieces remain.

Add the coconut oil and stir until smooth. If the mixture is not easy to pour add more oil.


Allow the glaze to cool for a few minutes then drizzle over the donuts.

You can double up on the recipe to make as much glaze as you want.


For a variation try my Red Velvet Blender Donuts


  • Writer: Moy's Gluten Free Kitchen
    Moy's Gluten Free Kitchen
  • May 23, 2019
  • 3 min read

Updated: Mar 19, 2021

Breakfast cereal was a part of my childhood. I would sometimes have it in the morning, along with fruit and maybe a cup of tea or hot chocolate. It was an easy fix, no need to turn on the stove, no need to get the help of a grownup. My favorites were rice krispies and just regular corn flakes.


Now, when I feel for it, instead of purchasing the more expensive gluten free cereal, I make my own. Most of the time, it gets eaten as a snack because it's just so convenient to pack and go. Understandably, since I love all things chocolate this recipe was my first choice.


It's simple to put the dough together and you can always adjust the flavor or the amount of sugar to your liking. The challenge for me is patiently cutting the dough into more or less equal sized pieces. After cutting the millionth piece (gross exaggeration is firmly a part of my culture), I ignore my own suggestion to space the pieces in the tray so that they do not touch. Therefore, after baking for the first 8 minutes, I would separate any of the pieces that stuck together which in retrospect does not take that long at all. There is no strict rule to follow here, so you can decide what works best for you.

I like a crunchy cereal, one that does not get soggy too quickly when milk is added. To achieve that I let the cereal dehydrate until it’s very crisp but of course not hard enough to break my teeth when I bite into it dry. Again, let your preference dictate the final result.

I hope you enjoy this recipe, shoot me a message if you try it, I’d love hearing from you.


Homemade Cocoa Breakfast Cereal
Gluten Free Vegan Homemade Cocoa Breakfast Cereal
Homemade Breakfast Cereal wtih Non Dairy Milk
Delicious Gluten Free Vegan Breakfast Cereal

Gluten Free and Vegan Cocoa Breakfast Cereal Recipe


Ingredients

½ cup brown rice flour

¼ cup potato starch

¼ cup tapioca starch

¼ cup almond flour

¼ tsp xanthan gum

1 tbsp finely ground flaxmeal

¼ cup natural unsweetened cocoa powder

1 tsp baking powder

½ tsp baking soda

¼ cup brown sugar (more or less to preference)

½ tsp salt

2 tbsp coconut oil

¼ cup water (add more by tablespoon)

1 tbsp apple cider vinegar

potato or tapioca starch for dusting work surface

Cereal noodles
Making the cereal. In the final version, the "noodle" was more rounded

Directions

Preheat oven to 425 F. Line a baking tray with parchment paper and set aside.

Prepare a work surface to roll out the dough, dust liberally.

Place all of the dry ingredients in a mixing bowl, stirring until completely combined. To the dry ingredients add the oil and water, not the vinegar. If using a mixer, attach the dough hook and on low beat the mixture to form a firm but sticky dough, adding a little water at a time if it is dry to the touch. Let the dough sit for 5 minutes.

After 5 minutes check the dough. Some of the water may have been absorbed. If the dough feels more firm and less sticky add a little bit of water. Add the vinegar, start on a low speed to incorporate the vinegar, then raise to high. Beat until the dough comes together, sticky but firm.

You can shape the cereal in whatever way works best for you. If you use a piping bag you may have to add more water to the dough and increase the baking time for a few minutes. I pinched off pieces of the dough and rolled it into elongated “noodles”. I placed the noodles on the tray one at a time, then I cut the noodle across the length into small pieces. Ensure that there is a bit of space between each piece. Work as quickly as you can to get the cereal into the oven, you do not want the leavening agents to lose their potency.

Place the tray in the oven and bake at 425 F for 8 minutes. After 8 minutes drop the oven temperature to 225 F and bake for 15 – 20 minutes. This last step dehydrates the cereal. The longer it stays in the oven the crunchier it will be. That influences how long it will take to soak up the liquid when you are eating the cereal. Since this is a personal preference, try varying times until you achieve a texture you like. The cereal will also firm up a bit more as it cools

Allow the cereal to cool completely on the tray, store in an airtight container. The cereal should be fine up to 2 weeks in a cool place.


bottom of page