top of page
A happy, healthy kitchen scene with a grocery brown bag of fruits and vegetables and_pantr

The Essential Guide to Gluten Free Living

“Tired of the guesswork? Discover what gluten-free really means and how to eat well—grab your free guide and start living better today!”

Recipes, Tips and Other Info

  • Writer: Moy's Gluten Free Kitchen
    Moy's Gluten Free Kitchen
  • Apr 13, 2019
  • 1 min read

egan and Gluten Free Banana Peanut Butter Sweet Potato Ice Cream
Banana Peanut Butter Sweet Potato Ice Cream

Banana Peanut Butter Sweet Potato Ice Cream


Ingredients


2 cups cubed cooked sweet potato*

1 medium sized banana

¼ cup peanut butter (to preference)**

¼ cup powdered sugar

¼ cup maple syrup (to preference)

1/8 tsp xanthan gum (optional)

¾ - 1 cup non dairy milk (more or less as needed)

½ tsp vanilla extract


*The sweet potato can be boiled or roasted.

**We used an organic, lactose free, vegan brand of peanut butter in this recipe.


Directions


Add all of the ingredients with the exception of the maple syrup and the xanthan gum (if using) to a blender or food processor.


Blend until smooth, scraping down the sides of the blender jar as necessary. The ice cream should be fairly thick and smooth, adjust any of the flavoured ingredients, sweeteners or milk to achieve your desired consistency or taste. Add the maple syrup slowly to the desired sweetness. Blend until creamy. The xanthan gum can be added at this stage if you decide to use it, this will help to prevent the ice cream form “icing” up.  


Scoop the ice cream into a freezer safe container and freeze until firm. A little salted caramel topping would be great with this, Enjoy!


Notes:

I leave my ice cream uncovered until it firms up. As the ice cream begins to firm up you can stir the mix from time to time to encourage the ice cream to set more evenly

.

For a lower carb version, leave out the powdered sugar; use more maple syrup as needed.


  • Writer: Moy's Gluten Free Kitchen
    Moy's Gluten Free Kitchen
  • Apr 13, 2019
  • 2 min read

Updated: May 20, 2021

When you are just starting out on a gluten free diet, it seems as though nothing will ever be the same again. It can be difficult figuring out what to eat. Shopping for food feels like a job better suited for a detective. Plus everything is suddenly more expensive.


In time you adjust, there are many gf alternatives for just about anything. There is no shortage for example of delicious gluten free crackers. Supermarkets have a wide variety available. I have my favorites and from time to time I'll buy a few boxes or packs.


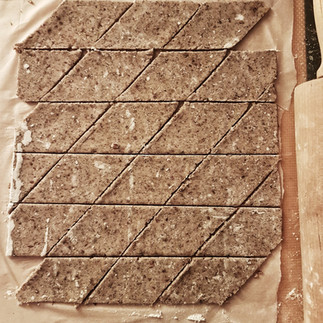
Sometimes it's actually more convenient to make a batch from scratch. Fortunately for me making gf crackers is neither difficult nor time consuming. Using this recipe as a base you could do your own add ins (e.g. seeds) or use different types of flour.


You're making crackers, how crunchy, crumbly, dry or what shape they should be, is entirely up to you. There are not many rules to follow. The "best crackers ever", is whatever you like. I love that, don't you?


Of course these crackers can also be served with dips and sides of your choosing. There really is no down side other than it's easier to buy??? Even so, this is a great recipe to try and it's also great at building your confidence to master gf baking. And...getting to control what ingredients you use is always a huge bonus!


Recipe next...


ree
Simple and Delicious Gluten Free Vegan Crackers
Gluten Free Vegan Crackers
ree

Gluten Free Vegan Crackers Recipe

Ingredients

1/2 cup brown rice flour

1/4 cup buckwheat (or other) flour 1/4 cup almond flour 1/2 tsp xanthan gum 1/2 tsp salt 1 tsp sugar 1 tbsp chia seeds 1/2 tbsp coconut oil 3 - 5 tbsp water (more if necessary)

Directions

Preheat oven to 350°F

Mix all the dry ingredients together.

Add the coconut oil and stir in until light crumbs form.

Add water to the mixture until it becomes a well combined dough, use more water if necessary. Leave the dough to rest for about 15 minutes

Roll out the dough on parchment paper to your desired thickness (thinner makes crunchier crackers). Score it with a knife, lightly tracing out your desired cracker size and shape. You can also use a cookie cutter for this step or simply break it up in rough pieces after baking. Lift the parchment paper into a baking tray

Bake for 8 - 12 minutes, watch it so it does not burn. The longer it bakes or the thinner it is rolled out, the crunchier the cracker


  • Writer: Moy's Gluten Free Kitchen
    Moy's Gluten Free Kitchen
  • Apr 13, 2019
  • 2 min read

Updated: Mar 9, 2021

There are days when you want a quick but decadent dessert. Maybe you have unexpected visitors. Or maybe you forgot that anniversary which you promised to celebrate. Whatever the reason, you need a dessert and you need it quickly.


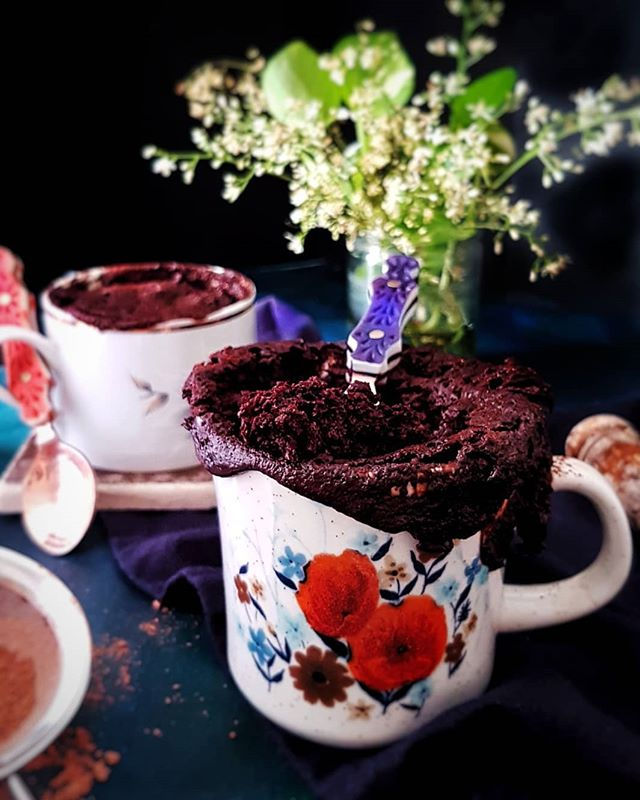
This chocolate mug cake recipe is just that, a decadent, delicious dessert that is ready within minutes. Make it, plate it, drizzle it with chocolate, serve it with ice cream, top it with fruits or whip cream and you have a dessert that looks like you spent hours to make.


Can you use another type of flour? Absolutely! The recipe should work well with a 1 to 1 gluten free flour blend. You may need to add xanthan gum, just a pinch, if your blend does not already contain it.


I love adding a piece of chocolate or chocolate chips to the batter so there will be a little surprise in the center when the cake is cut.


Best of all the recipe is uncomplicated and pretty forgiving. You could call it a brownie if it's fudgier than expected, whatever happens it will always be delicious!

Cassava Flour Gluten Free  Vegan Chocolate Mug Cake
Gluten Free Vegan Chocolate Mug Cake

Gluten Free, Vegan Chocolate Mug Cake Recipe

Ingredients

(this recipe makes 2 mug cakes)

1/4 cup cassava flour 4 tbsp cocoa powder 1/2 tsp baking powder 4 tbsp sugar 1/4 tsp salt 2 - 4 tbsp hot milk coffee (or just milk) 4 tbs coconut oil 1/2 tsp vinegar Drop or 2 of vanilla extract

Mix well, all of the ingredients in a bowl. Add more liquid very slowly if the batter needs thinning. Divide between 2 mugs and bake each separately in the microwave for about 50 seconds.

Note: I like to add chunks of chocolate to the batter before baking and once it is in the mug. This way you can create an unexpected chocolate lava cake


bottom of page